


Convert an Image into a PES Embroidery File: Easy Guide
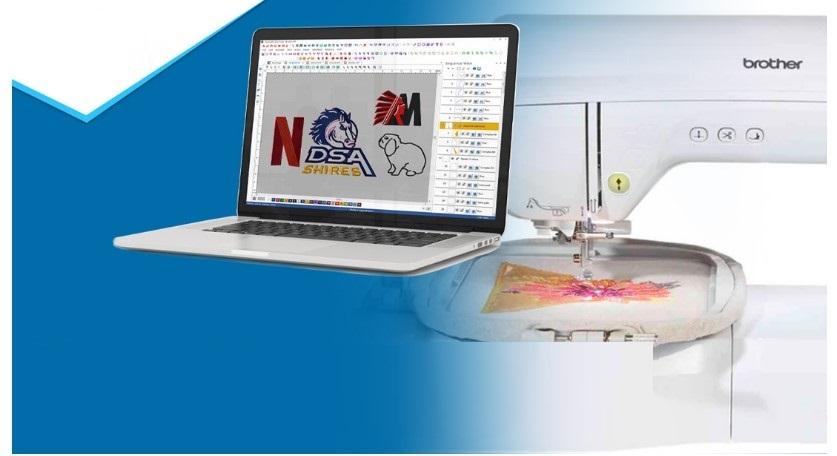
Turning a logo, drawing, or picture into an embroidery design sounds simple—until you try stitching it on fabric. An image may look perfect on a screen, but an embroidery machine needs very different information to reproduce it with thread.
If you want to Convert an Image into a PES Embroidery File, the artwork must first be digitized and converted into stitches. The PES format is commonly used for compatible embroidery machines, making it a practical choice when you want to turn digital artwork into a stitch-ready design.
In this guide, you will learn how image-to-PES conversion works, what you need before starting, which image formats are suitable, and how to get better embroidery results.
What Is a PES Embroidery File?
A PES file is a digital embroidery format that contains instructions for an embroidery machine. Instead of storing an image as pixels, it stores information such as stitch placement, thread colors, stitch types, and design positioning.
Think of a regular image as a picture and a PES file as a set of sewing instructions.
When an embroidery machine reads the file, it follows those instructions to create the design with thread.
Can You Convert Any Image to PES?
Yes, almost any clear image can be turned into a PES embroidery file, but the conversion is not always a simple file-format change.
A JPG or PNG contains pixels. An embroidery file needs stitches. Because of this difference, proper embroidery digitizing is usually required.
For example, a simple logo with bold shapes can often be digitized quite easily. A detailed photograph, however, may require careful editing, shading, stitch planning, and color reduction.
The quality of the original artwork also makes a big difference.
How to Convert an Image into a PES Embroidery File
The conversion process generally involves several important stages.
1. Choose a Suitable Image
Start with the clearest version of your artwork.
Good choices include:
- High-resolution JPG images
- PNG files with clean edges
- Simple logos
- Vector artwork
- Digital illustrations with distinct colors
Avoid blurry or extremely small images whenever possible. A poor-quality source can make accurate digitizing much harder.
2. Clean Up the Artwork
Before creating stitches, inspect the artwork carefully.
Remove unnecessary backgrounds, fix rough edges, simplify complicated details, and make sure the important elements are easy to identify.
For instance, if you are digitizing a business logo, you may want to remove a textured background while keeping the main symbol and lettering.
Clean artwork gives the digitizer a better starting point.
3. Select the Design Size
Decide how large the embroidery will be before digitizing.
A design intended for a small shirt pocket will need different stitch planning from a large jacket-back design.
Size affects:
- Stitch density
- Small details
- Lettering
- Underlay
- Thread coverage
- Overall stitch count
Simply enlarging or shrinking an existing embroidery file can sometimes produce poor results. The design may need to be adjusted specifically for its final size.
4. Convert Artwork into Stitches
This is the most important part of the process.
Embroidery digitizing software is used to recreate the artwork using different stitch types. Common options include satin stitches, fill stitches, and running stitches.
The digitizer decides where stitches should begin and end, how areas overlap, and how the design should be sequenced.
This is why professional image-to-embroidery conversion is more than pressing a "convert" button.
5. Set Thread Colors
The colors in your original artwork need to be translated into embroidery thread colors.
You may need to simplify the color palette because thread cannot reproduce every tiny color variation found in a digital image.
For a clean logo, using a few carefully selected thread colors can often create a better result than trying to reproduce every shade.
6. Add Underlay Stitches
Underlay provides a foundation underneath the visible stitches.
It can help stabilize fabric, support top stitches, and improve coverage. The correct underlay depends on the fabric, design, stitch type, and embroidery size.
Too little support can cause weak coverage or distortion, while excessive underlay can make the design unnecessarily dense.
7. Adjust Stitch Density
Stitch density controls how closely stitches are placed together.
High density is not automatically better. Too many stitches can make the design stiff, bulky, or difficult to sew.
The goal is balanced coverage that works well with the chosen fabric and thread.
8. Save the Design as PES
After the artwork has been digitized and checked, the design can be exported in PES format.
Before transferring the file to your embroidery machine, verify:
- Design dimensions
- Hoop size
- Thread colors
- Stitch count
- Stitch sequence
- Machine compatibility
A PES file should be prepared for the machine and hoop you plan to use.
Image Formats You Can Use
Several common image formats can serve as starting artwork for PES digitizing.
JPG
JPG is widely used for logos, photographs, and digital artwork. However, compression can create blurry edges, so a high-quality JPG is preferable.
PNG
PNG files are especially useful when the artwork has a transparent background. They can provide clean edges for logos and illustrations.
SVG or Other Vector Artwork
Vector artwork can be an excellent starting point because shapes and lines can usually be scaled without losing quality.
If you already have a clean vector logo, digitizing it may be easier than working from a low-resolution image.
Why Automatic Image Conversion May Not Be Enough
Automatic conversion tools can be useful for basic experiments, but embroidery requires decisions that ordinary image conversion does not always understand.
A computer can identify colors and shapes, but it may not know:
- Which stitch type suits a particular shape
- Where underlay should be placed
- How fabric will move during stitching
- How to prevent excessive density
- How small lettering should be handled
- Which stitching sequence will reduce unnecessary jumps
This is why manual editing and professional PES embroidery digitizing can make a noticeable difference.
Common Problems After Image-to-PES Conversion
Even when a design looks correct on screen, several issues can appear during stitching.
Too Many Stitches
Excessive stitch counts can increase production time and create bulky embroidery.
Small Details Disappear
Very fine lines and tiny shapes may not translate well into thread. Some details need to be enlarged, simplified, or removed.
Lettering Becomes Unclear
Small text can be particularly difficult. Embroidery lettering needs enough space and appropriate stitch planning to remain readable.
Fabric Puckering
Puckering can occur when stitch density, underlay, tension, stabilizer, or fabric characteristics are not properly balanced.
Incorrect Stitch Sequence
Poor sequencing can increase jumps, thread trims, color changes, and unnecessary movement.
These problems show why testing the design on the actual fabric is an important part of the process.
Tips for Better PES Embroidery Results
If you want a cleaner result, keep these practical tips in mind:
- Start with high-quality artwork. Clear artwork makes digitizing easier.
- Avoid unnecessary details. Simplified designs often stitch better.
- Choose the correct embroidery size. Small designs require special planning.
- Use suitable stitch types. Different shapes need different approaches.
- Balance stitch density. More stitches do not automatically mean better quality.
- Test before production. A sample stitch-out can reveal problems before bulk embroidery.
- Consider the fabric. Denim, cotton, fleece, caps, and performance fabrics can require different settings.
- Check the hoop dimensions. Make sure the finished design fits your embroidery machine's available area.
Professional Image to PES Conversion
If you do not have embroidery digitizing experience, professional help can save time and reduce failed stitch-outs.
At Digitizing Buddy, image artwork can be prepared and digitized into a machine-ready embroidery design. The focus should be on more than simply changing the file extension—the artwork needs to be converted into properly planned stitches.
Professional digitizing is particularly helpful for:
- Business logos
- Custom clothing
- Team uniforms
- Hats and caps
- Jacket designs
- Embroidered patches
- Small lettering
- Detailed artwork
The final result depends on both the artwork and how intelligently it is digitized.
How to Prepare Your Image Before Conversion
A few minutes of preparation can make the entire process easier.
Before submitting your artwork, try to provide:
- The highest-resolution image available
- A transparent background when appropriate
- The preferred embroidery dimensions
- Your desired thread colors
- The fabric type
- The machine and hoop information
- Any important details that must remain visible
If you have multiple versions of a logo, provide the cleanest original rather than a screenshot copied from a website.
Is Converting an Image to PES the Same as Renaming the File?
No.
Changing .jpg to .pes does not create a usable embroidery design. The two file types contain completely different types of information.
A JPG stores visual pixels, while a PES file contains embroidery instructions.
Proper conversion requires digitizing the image into stitches and then exporting those stitches into the PES format.
When Should You Use Professional Digitizing?
Professional digitizing is worth considering when the design is important, detailed, small, or intended for commercial production.
If you only need a basic personal design, you may experiment with embroidery software yourself. But if the design will appear on customer clothing, uniforms, merchandise, or branded products, a professionally prepared file can help prevent costly production problems.
Final Thoughts
Learning how to Convert an Image into a PES Embroidery File starts with understanding one important difference: an image is artwork, while an embroidery file is a set of stitch instructions.
The best results come from clean artwork, appropriate sizing, thoughtful stitch selection, balanced density, proper underlay, and testing on the intended fabric.
Whether you are converting a simple logo or a more detailed illustration, taking the time to prepare and digitize the design correctly can make your final embroidery cleaner, sharper, and easier to stitch.
FAQs
1. Can I convert a JPG directly into a PES file?
Not in the same way you convert one image format to another. A JPG needs to be digitized into embroidery stitches before it can be exported as a PES file.
2. What image is best for PES embroidery conversion?
A high-resolution logo, PNG with a transparent background, or clean vector artwork is generally a good starting point. Clear shapes and distinct colors make digitizing easier.
3. Can a photograph be converted into PES?
Yes, but photographs are more challenging than simple logos. They may need color reduction, artistic interpretation, and careful stitch planning to produce attractive embroidery.
4. Why does my converted embroidery look different from the original image?
Thread behaves differently from pixels. Fine details, gradients, tiny text, and subtle color changes may need to be simplified or adjusted for embroidery.
5. How can I get a better-quality PES embroidery file?
Use high-quality artwork, choose the correct final size, balance stitch density, use suitable underlay, and test the design on the intended fabric before production. Professional digitizing can also improve consistency and stitch quality.

 French